The Ultimate Guide to the Onboarding Process:
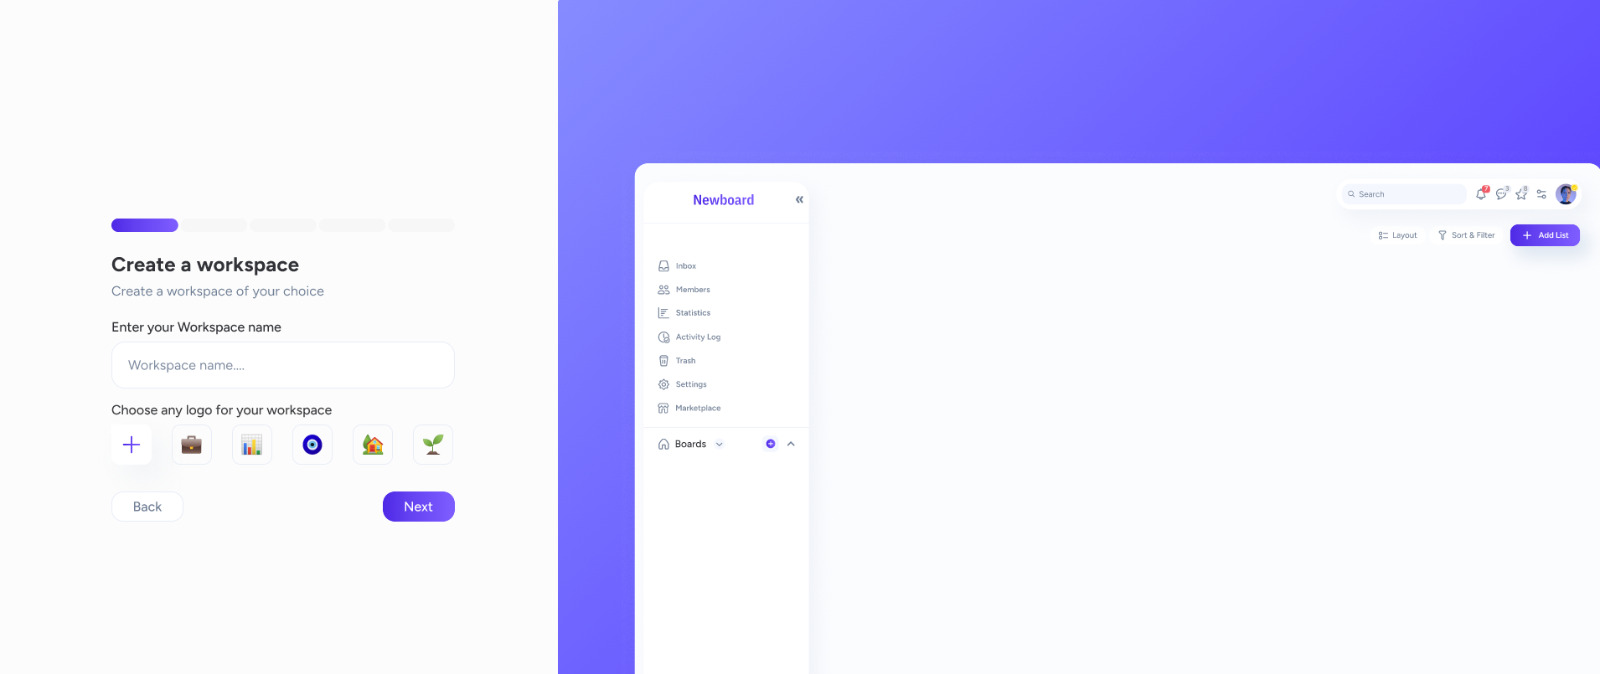
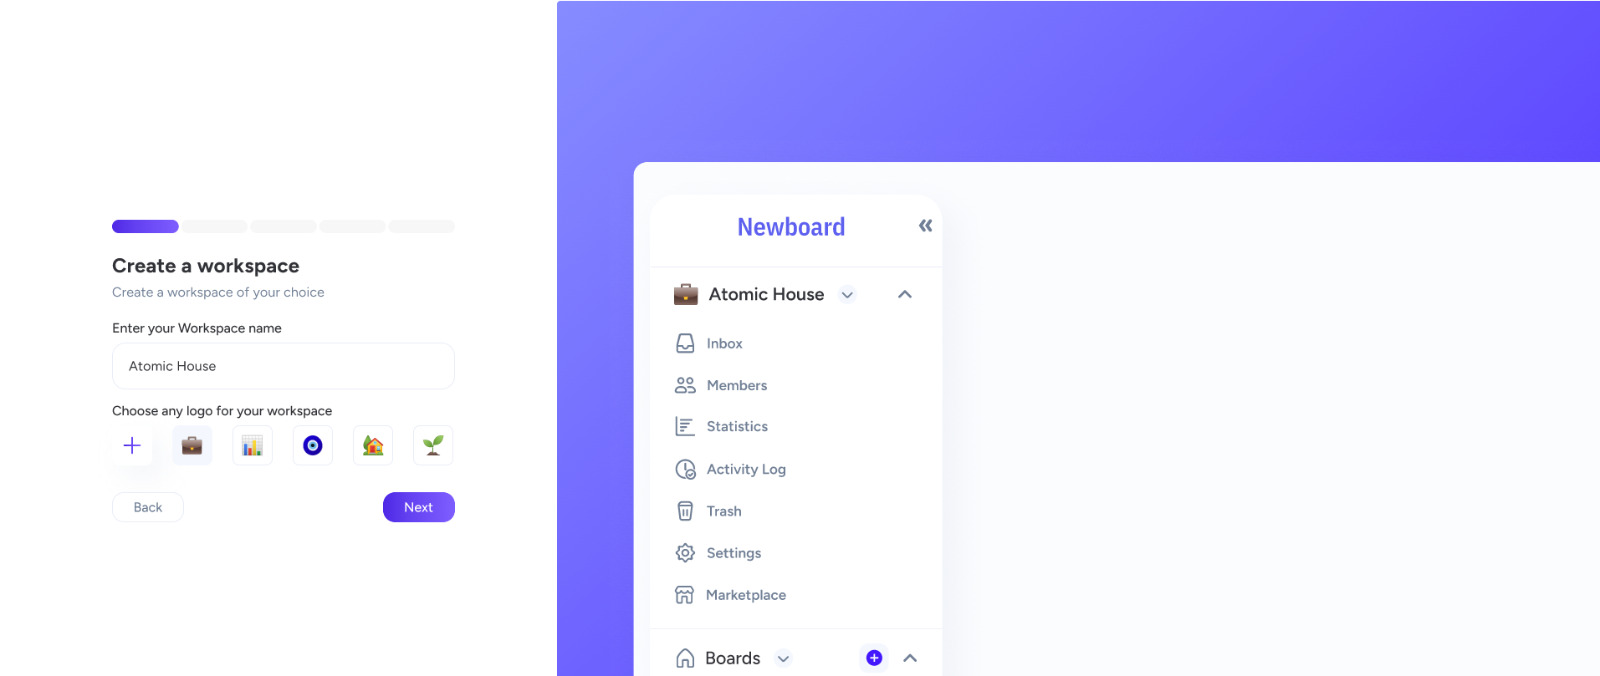
Workspace Name :
After signing up, your onboarding process starts with naming your workspace. This is the main hub where all your work will be organized.
Choosing a relevant and easy-to-remember workspace name will help you and your team stay focused and connected.
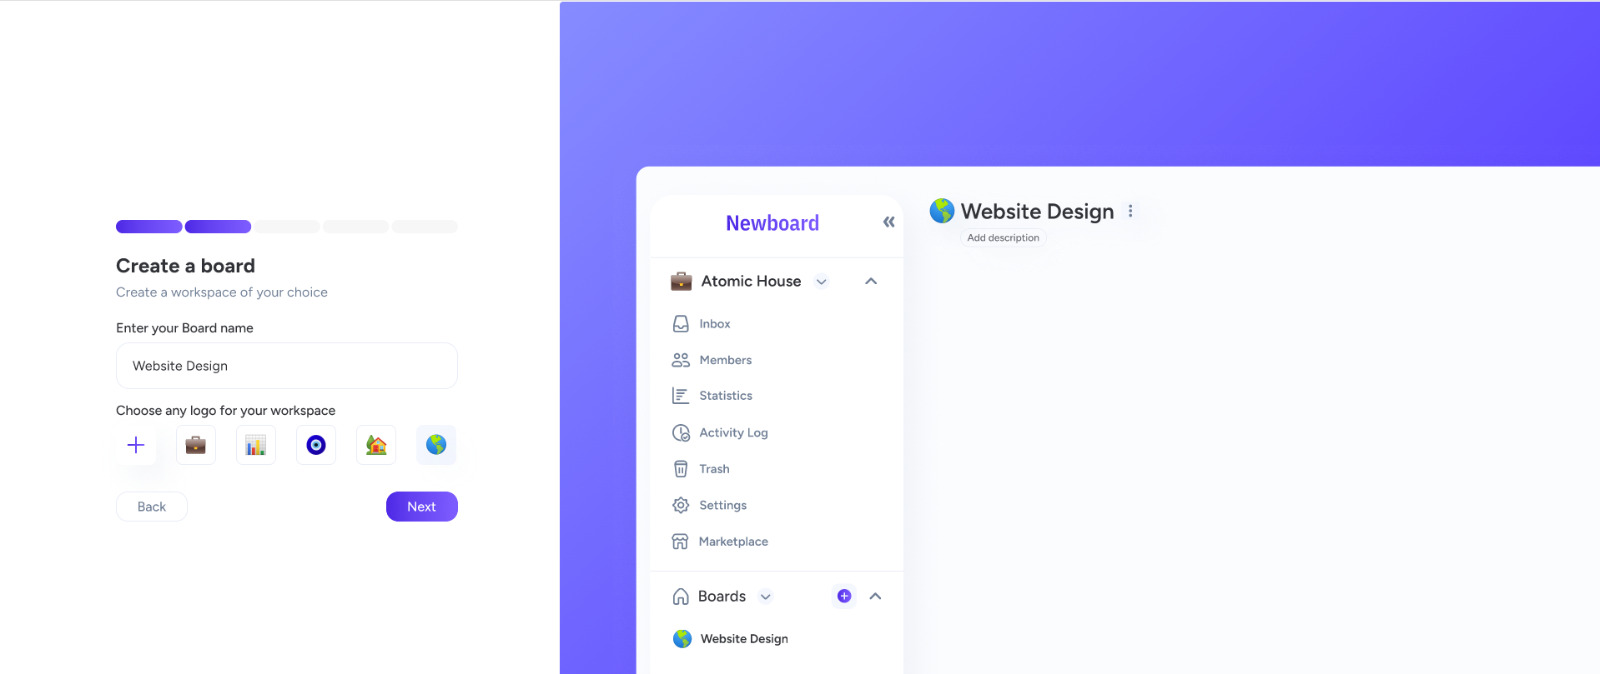
Board Name :
Upon clicking "Next" after selecting your workspace name, you'll be prompted to provide a board name. Boards help in categorizing tasks or projects within your workspace.
Give your board a clear and descriptive name to ensure clarity and easy navigation throughout your projects.
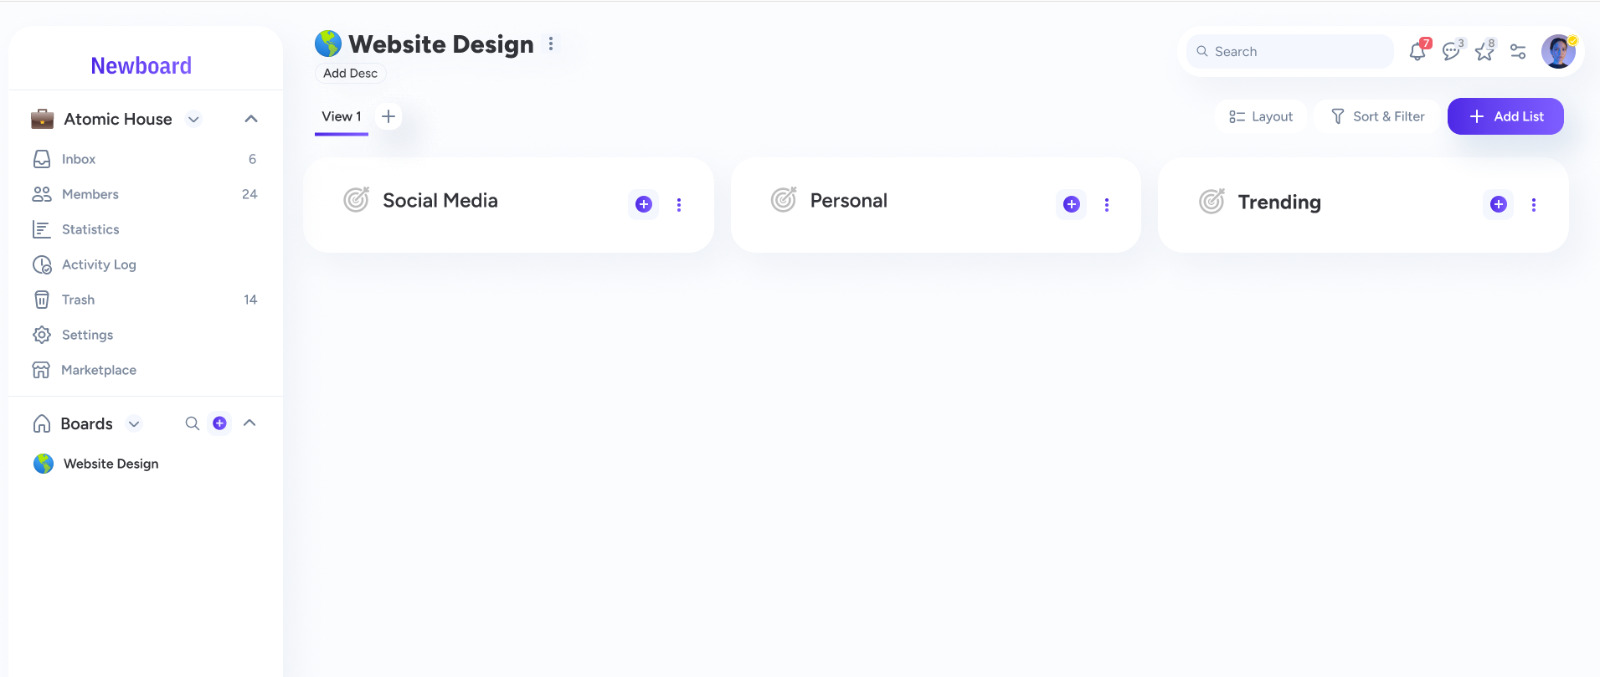
List Names :
After naming your board, click 'Next' to name the lists. Lists are a way to break down tasks within a board and keep things organized.
Assign specific names to your lists to streamline your workflow and prioritize tasks effectively.
Workspace Type :
After naming your lists, the next step involves choosing whether the workspace is for a team or an individual. This decision determines the collaboration settings and access levels within the workspace.
Ensure you select the appropriate workspace type to optimize communication and project management within your team.

Finalization
Once you've completed the above steps, you're good to go! The onboarding process sets up your workspace structure, allowing you to start utilizing the platform efficiently.
Double-check your workspace settings and configurations to ensure everything aligns with your workflow and preferences.